
In this article, we are going to teach you completely and step by step how to install WordPress.
After reading this article, you can easily install and set up WordPress on your site.
Make sure your domain is enabled before you install WordPress. If your domain is .ir, it takes between one to two days to be active.
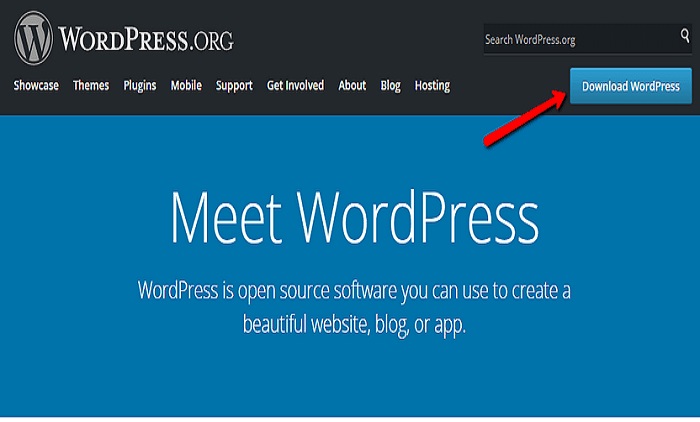
To install WordPress site builder software, you must first download this software
To do this, just search in the Google search engine “WordPress” and then download the latest version.
1:
When you enter the site download the latest version Note that when we wrote this article, the latest version was 5.3, but a newer version may be available while you are downloading.
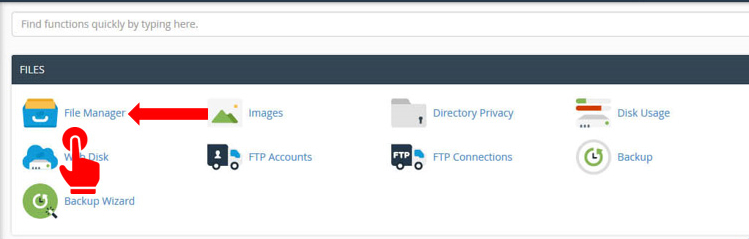
After you have downloaded WordPress, it is time to install it on your host.
To do this, you will enter your site’s portal through the training provided in the host sections.
2:
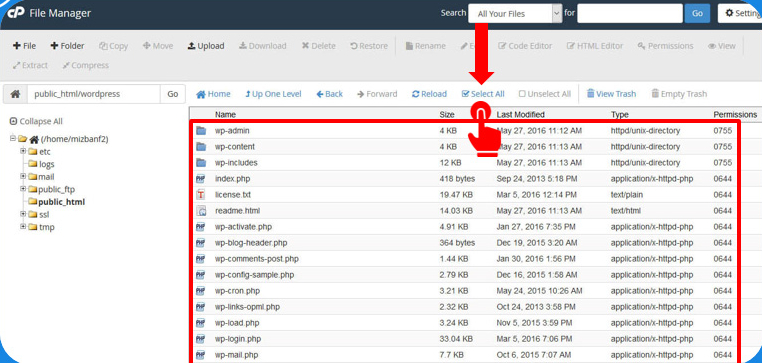
After that, you enter File Manager from the FILES . Next is the following figure:
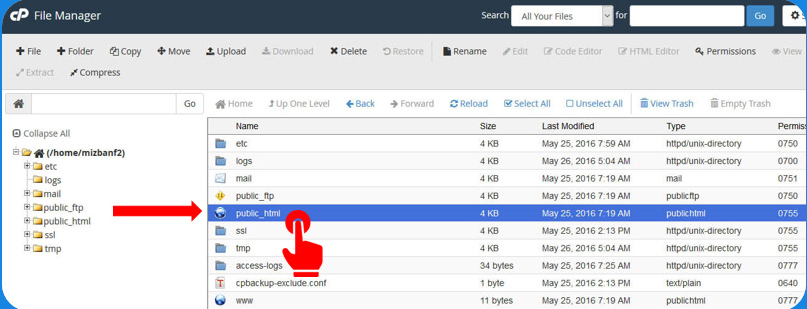
3:
After entering this folder, go to public_html as shown below:
4:
After that, from the menu bar at the top of the page, just like the image below, select the upload option and open the WordPress file that we downloaded in our system:

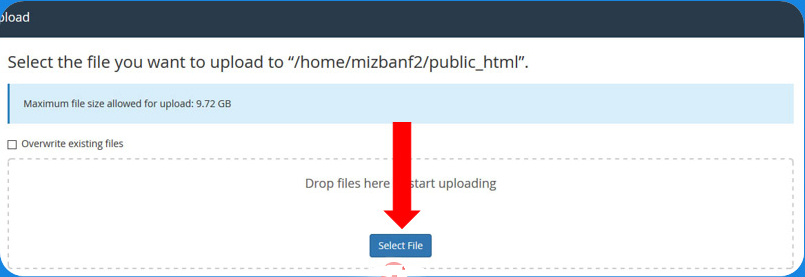
5:
After clicking the upload button, you will enter a page, click the Select File button as shown below and upload the WordPress file:
6:
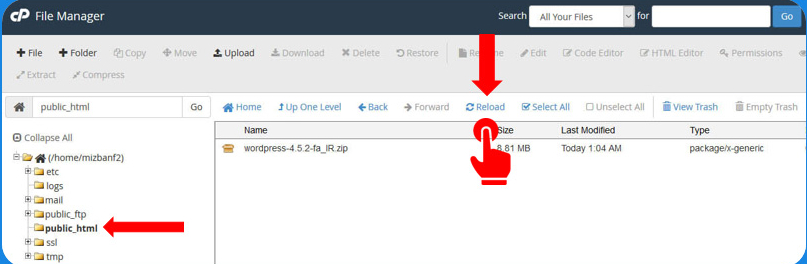
After this, the WordPress file is in the public_html folder, and when you re-enter this folder, you will see it.
If not, just click the Reload button to display the file. Like the image below:
7:
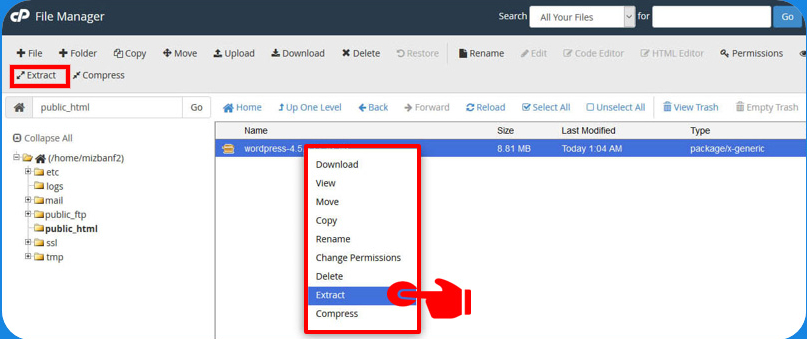
The point is that this WordPress file is compressed and first of all you have to unzip it.
You can do two things for this purpose, or click on the WordPress file and select Extract from the menu at the top of the page.
Or right-click on the file and select Extract. According to the following figure:
8:
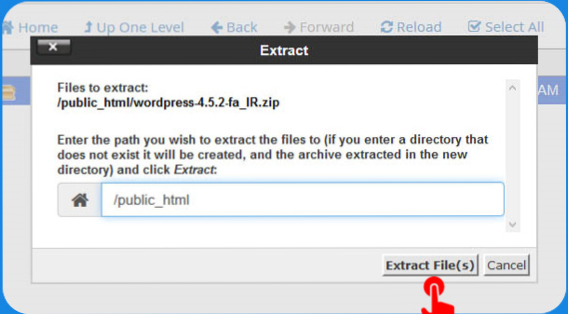
What you did opens a window like the one below. Click the extract files button there:
So far, all we have done is put all the WordPress files in the WordPress folder.
But we want these to be in the domain path of our domain, ie on the domain path of idehweb.com, for example.
So we have to move all this to the public_html folder which is the main path of our domain
.
9:
To do this, you must enter the WordPress folder and select the “select all” option from the menu bar at the top of the page to select all the files in this folder.:
10:
After we select this option, everything turns blue, which means being selected. Now click the Move button so we can move them:
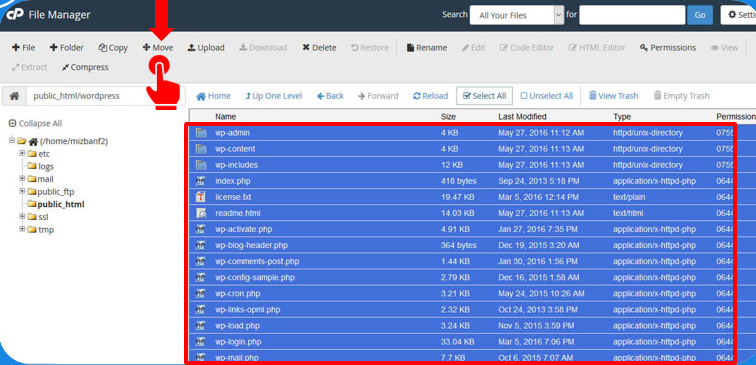
11:
When you press the Move button, a window will open with a URL written in the box below.
Delete the last part of that address and leave only the public_html part.
With this way you are told to move the files to this folder. Just like the figure below:
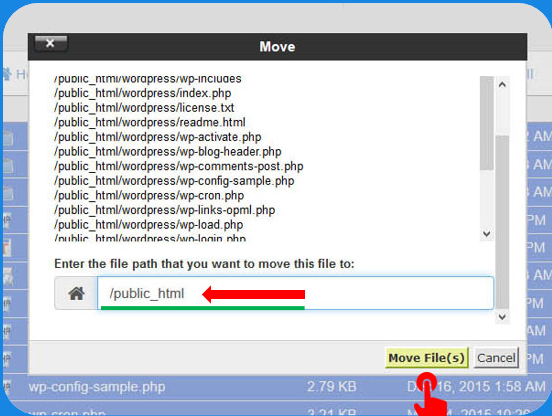
12:
Then select the option (Move File (s)) to transfer the file.
Now if the files are transferred correctly, when you click on the public_html folder from the left, you should be able to see all the files in this folder.
Just like the picture below:
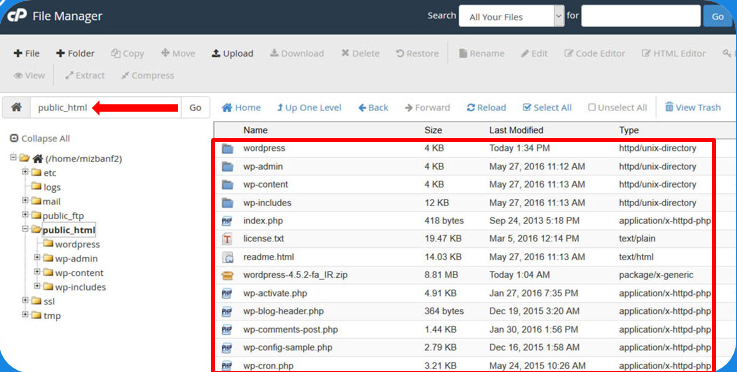
13:
Now WordPress is installed on our host. To make sure that your site’s main URL is also installed, if a page like the one below opens, it means that your file has been successfully installed:
If such a page does not come up, it means you went to the wrong place. Which has two modes:
You did not properly transfer the WordPress file to the public_html folder
Your site domain has not been activated yet and you will have to wait for it to be activated
After this, WordPress is installed on the host.
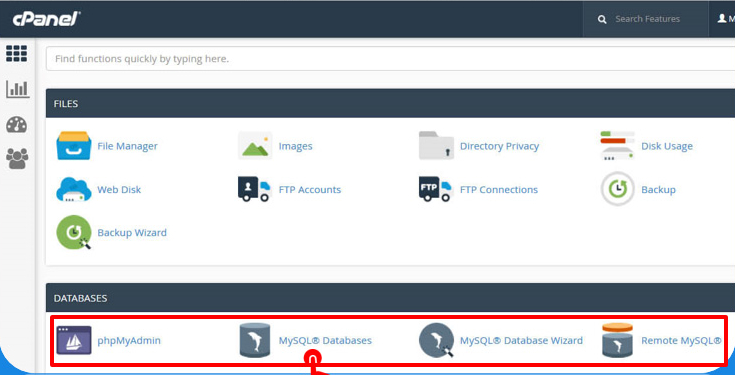
Now it’s time to create a database for your site; So that WordPress can save its files on a regular basis
14:
To do this, like the image below, we enter mysql databases from the databases section, like the image below:
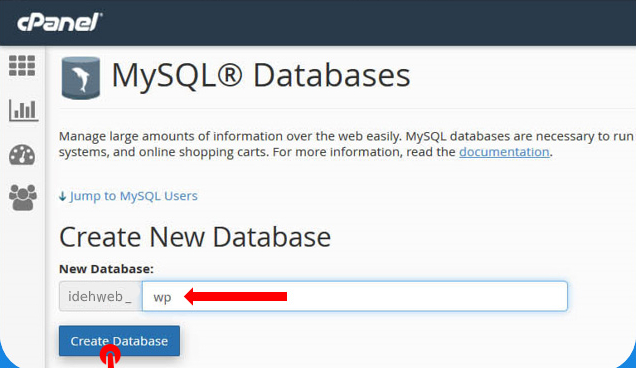
15:
Then in the Create New Database section, select a name for the database in the New Database box. This is quite a taste, but try to leave something simple. Like the image below:
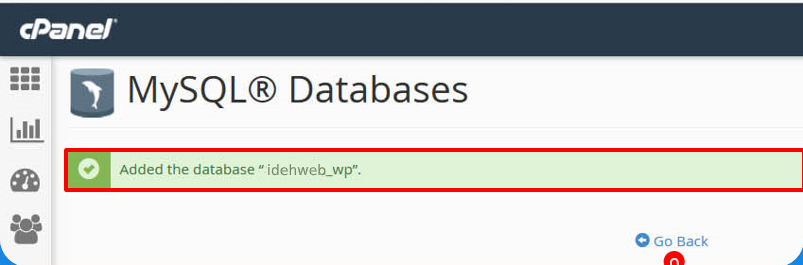
When you click the Create Database button, a green message will appear that says Added the database. This means database is made.
Now click the go back button so you can do the next step. Like the following figure:
When you do this, you will be returned to the database settings page. Now we need to choose a username for our database.
To do this, go to the MySQL Users section and select the username for the database in the Username section. Try not to choose a name too hard:

Choose a password or the same password. Try to keep your password strong, not something easy.
If you can not choose a strong password, you can click on the passwoed generator button to have the system itself suggest a password.
And a box like the one below will open for you:
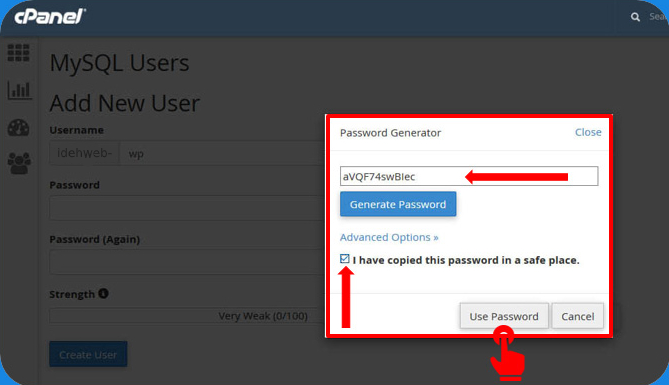
The password you chose will be needed later, so be sure to write it down somewhere.
When you have done this, check “I have copied this password in a safe place” and select the “use password” option.
Then click “create user” to finalize the database username. Like the following figure:
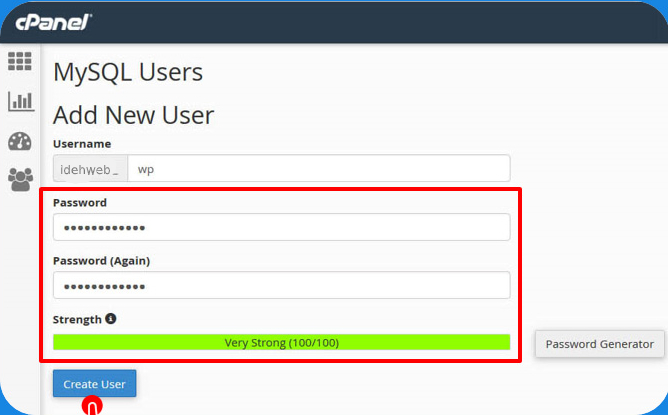
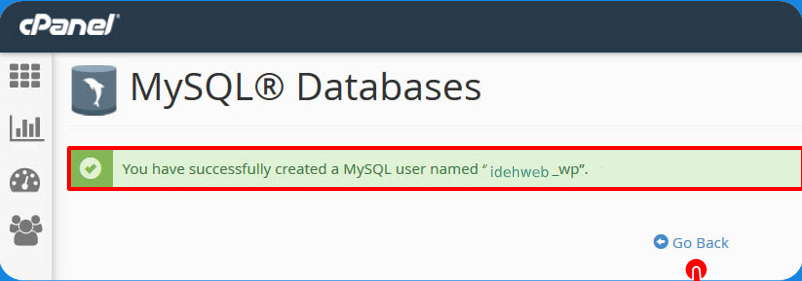
If you see this green message like the picture below, it means that you did the job correctly.
Now click the go back button to return to the WordPress settings page:
16:
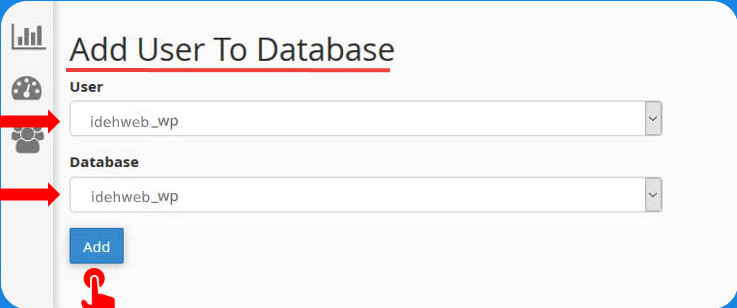
Now we need to connect our database to the username we created.
To do this, at the bottom of the MySQL Databases page, in the “Add User To Database” section, then in the user box, type the name of the database that you created in the previous step, and in the database box, add the name of the database that you created in the previous step.
Just like the image below:
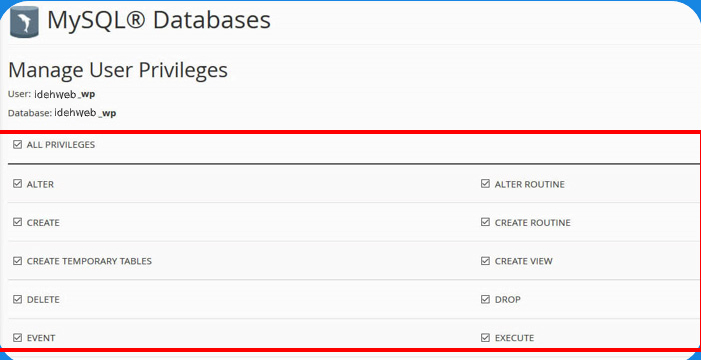
Now press the add option to enter the Manage User Privileges page, where the username and database you want to connect are specified.
You just check the ALL PRIVILEGES option to select all the permissions like the image, then come to the bottom of the page and press the Make Changes button:
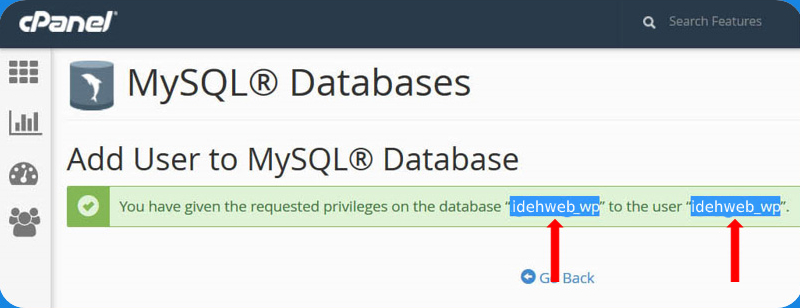
Then you will see a green message like the one below. In this green message, note the name of the database and the username of your database so that you have it:
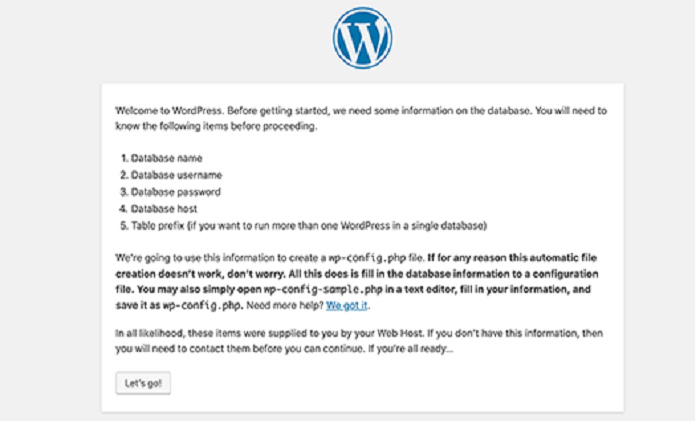
Now database has been created. Now it’s time to install WordPress:
17:
Now database has been created. Now it’s time to install WordPress:
18:
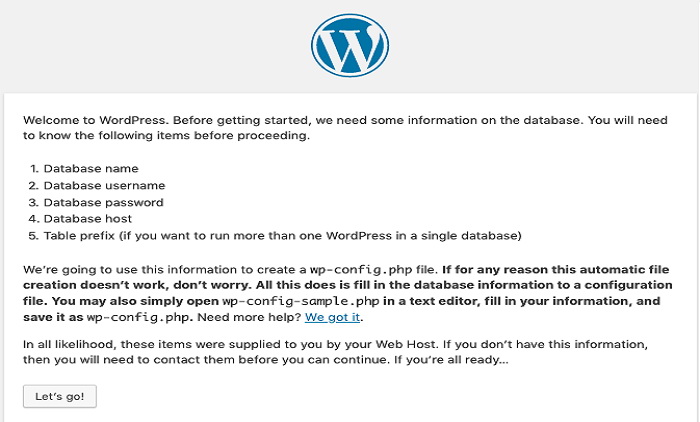
At this stage,you can use the 3 names that we told you to write down .
Now a box like the one below has come up to you:
In the name of the database, the name of the database that you created in the first step.
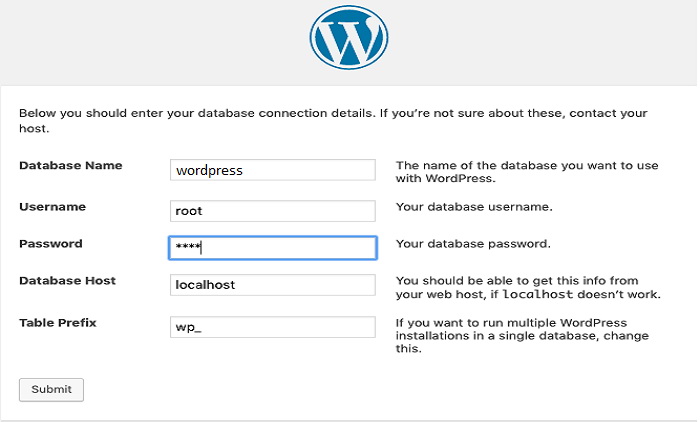
In the username field, enter the database username you created in the second step, and in the password field, enter the password you selected.
Be sure to enter localhost in the database host. In the table prefix, it also gives wp_ by default, you can change it.
And then click Send. If you get an error, go back to the database information setup step and check that you have entered everything correctly.
If everything is correct, such a page will open for you:

You have to click the install button to enter the next step.
19:
At this stage, you must enter additional information for your site:
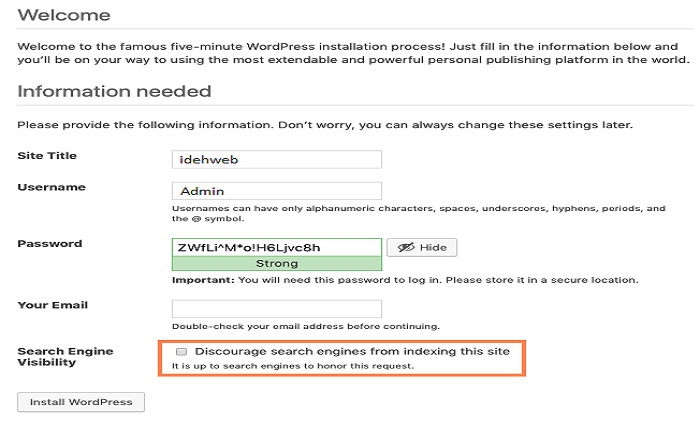
In the title of the site, write the name of your site, in the username, you must give a name to enter the WordPress admin panel, which is usually used by admin.
You have to choose a password that is to enter the WordPress admin panel, just remember to write it down as before Because you need them to enter the WordPress admin panel. Leave an email in the email field.
Search engine optimization is also very important.
If you click on this, it means that Google bots can see and evaluate your site from that moment.
Until you do this, these robots will not be able to see your site and your body score.
Usually, they do not tick this first until to bring site to a certain level. Then they fight between them to get good points.
Then click the Start WordPress button to open the login page.
This means that you have done all the steps correctly and now click on the login button to enter the login page of the panel.
When a page opens, it looks like the picture below:
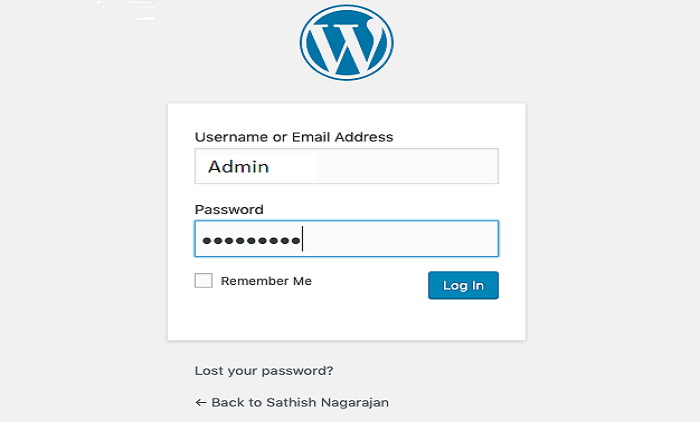
Here you have the same username and password that we said in step nineteen, and enter it so that you can enter the WordPress panel. and over…
Leave a Reply