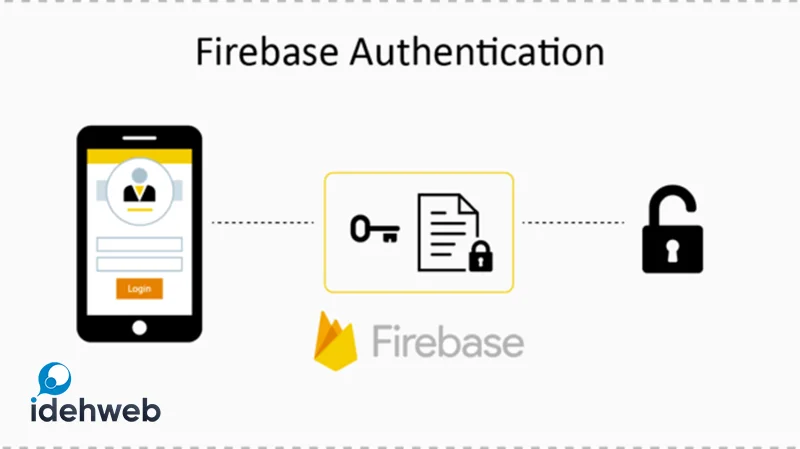
Firebase Authentication is a powerful tool for user authentication in web applications. In this blog post, I will explain how to authenticate users using Google Sign-In with Firebase.
The process of authenticating with Firebase is seamless and beneficial for both end users and developers. Firebase Authentication offers backend services, user-friendly SDKs, and pre-built UI libraries, allowing developers to prioritize user experience without getting burdened by complex infrastructure.
Firebase provides various authentication options to cater to diverse user preferences. Users can authenticate using their email addresses or through third-party providers like Twitter, Facebook, Github, Google, Microsoft, and many others. This versatility ensures that users can choose the authentication method that suits them best.

Features of Firebase for Authentication?
Firebase Authentication offers a range of features to simplify user authentication and identity management in your app. Some of the key features include:
- Email/Password Authentication: Firebase supports traditional email/password authentication, allowing users to create accounts and sign in securely using their email addresses and passwords.
- Social Sign-In: Firebase Authentication provides built-in support for popular social sign-in methods such as Google Sign-In, Facebook Login, Twitter Sign-In, and GitHub Sign-In. This feature enables users to sign in to your app using their existing social media accounts.
- Phone Number Authentication: Firebase offers phone number authentication, allowing users to sign in to your app using their phone numbers. This feature simplifies the login process and eliminates the need for users to remember complex passwords.
- Custom Authentication: Firebase Authentication allows you to integrate your own authentication system into your app using custom authentication methods. This feature gives you flexibility in implementing your own authentication logic while leveraging Firebase’s backend services.
- User Management: Firebase provides user management functionalities, including the ability to create and manage user accounts, update user profiles, and handle password resets. It also allows you to customize user properties and store additional user data.
- Identity Providers: Firebase supports a wide range of identity providers, including Google, Facebook, Twitter, GitHub, Microsoft, Apple, and more. This flexibility enables you to offer multiple sign-in options to your users.
- Account Linking: Firebase Authentication allows you to link multiple authentication providers to a single user account. This feature enables users to sign in using different methods and seamlessly link their accounts together.
- Security and Compliance: Firebase Authentication handles secure storage of user credentials and implements industry-standard security practices. It also complies with privacy regulations, such as GDPR and CCPA, to ensure user data protection.
- Authentication State Management: Firebase provides APIs and tools to manage the authentication state of your app, including monitoring sign-in and sign-out events, tracking user sessions, and handling authentication tokens.
These features make Firebase Authentication a powerful and flexible solution for handling user authentication in your app, providing a seamless and secure user experience.

steps to use firebase to authentication in website
to use firebase to authentication in website, you can follow these general steps:
- Create a Firebase Project: Go to the Firebase console (console.firebase.google.com) and create a new project. Give it a name and select your preferred region.
- Set up your Website: In the Firebase console, add your website by clicking on “Add app” and choosing the “Web” option. Provide a nickname for your app and register its domain.
- Get Firebase Configuration: After setting up your website, Firebase will provide you with a configuration object containing API keys and other settings. Keep this information handy as you’ll need it later.
- Install Firebase SDK: Add the Firebase SDK to your website by including the Firebase JavaScript library. You can either use a CDN or download the library and host it locally.
- Initialize Firebase: In your website’s JavaScript file, initialize Firebase using the configuration object you obtained earlier. This will establish a connection between your website and Firebase services.
- Enable Authentication Providers: In the Firebase console, navigate to the “Authentication” section and choose the authentication providers you want to enable for your website (e.g., Email/Password, Google, Facebook, etc.). Follow the instructions for each provider to set it up.
- Implement Authentication Logic
- Monitor Authentication State
- Customize the User Interface
- Test and Deploy: Test your authentication flow thoroughly to ensure everything is working as expected. Once you’re satisfied, deploy your website to a hosting provider and make it available to users.
How to use firebase to authentication in plugin: login with phone number wordpress
It’s interesting to know that we have provided a complete tutorial on using Firebase for “Login with Phone Number” in WordPress. Please follow this link to access and read the tutorial.

Leave a Reply